How to produce bibliographic metadata for your web page?
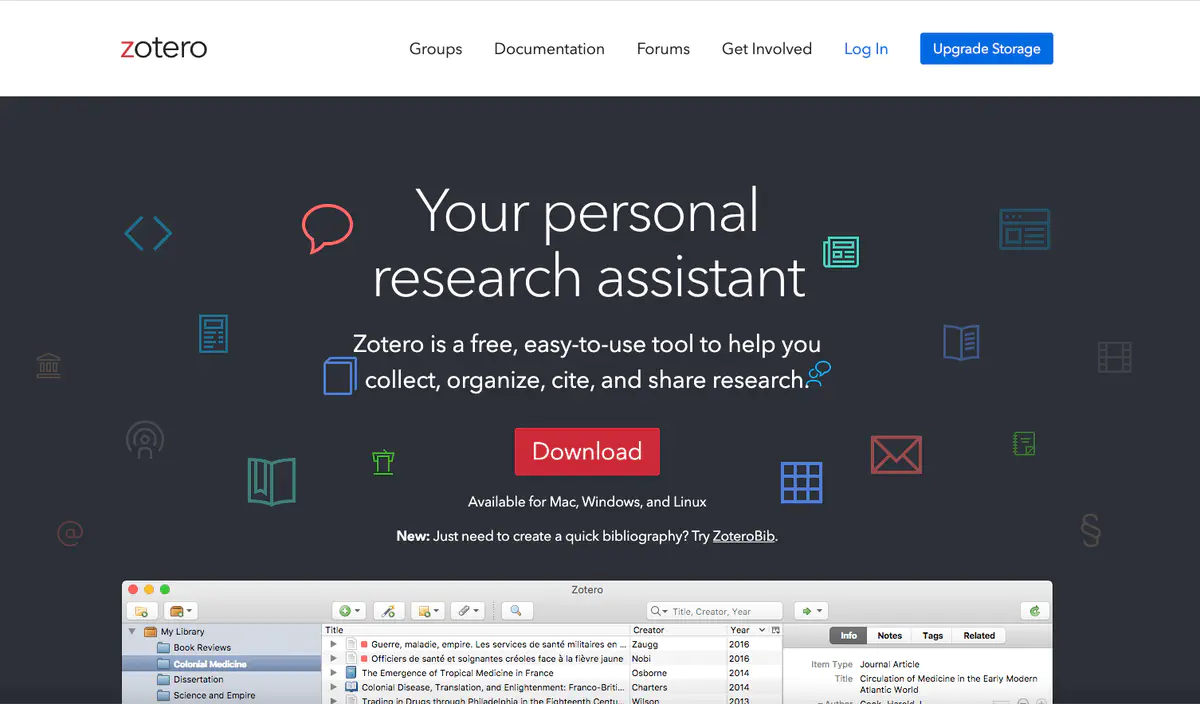 Zotero is a free bibliography manager
In an accompanying post I explain why to provide bibliographic metadata for your web entries could be beneficial.
Requirements
In this tutorial, I will show how to produce and embed bibliographic metadata into your web page. To follow this guide, I assume that:
- you have installed the standalone version of Zotero.
- you have installed the appropriate Zotero connector (plugin) for your browser.
- you have a working knowledge how to use Zotero (There are many (video) instructions on the internet, see for instance the ‘official’ Zotero Quick Start Guide or the introduction by the Idaho State University).
Bibliographic metadata in 14 small steps
Start Zotero and your browser. Go to the page where you want to embed the metadata. You see the Zotero icon for web pages in the place where your web browsers shows the symbols for its installed extensions.
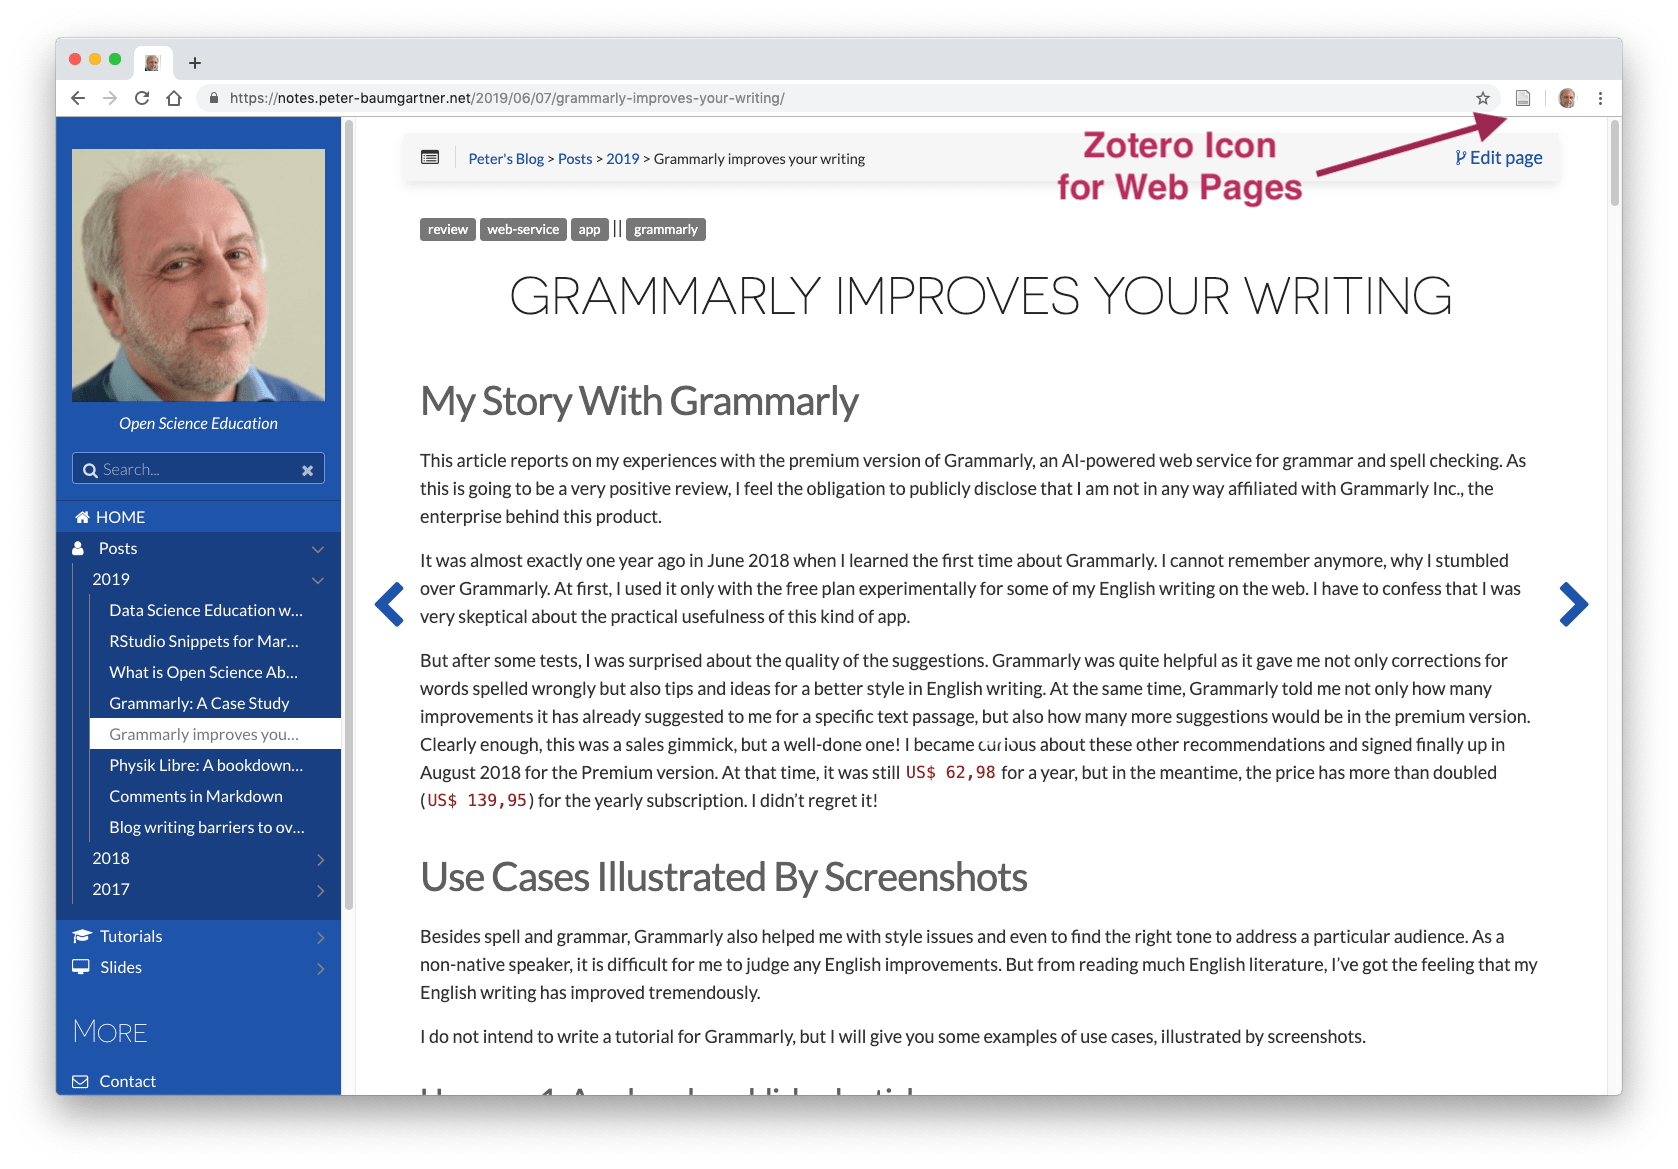
Figure 01: Target web page for embedding bibliographic metadata. Click on the icon and download the rudimentary bibliographic information for the web page.
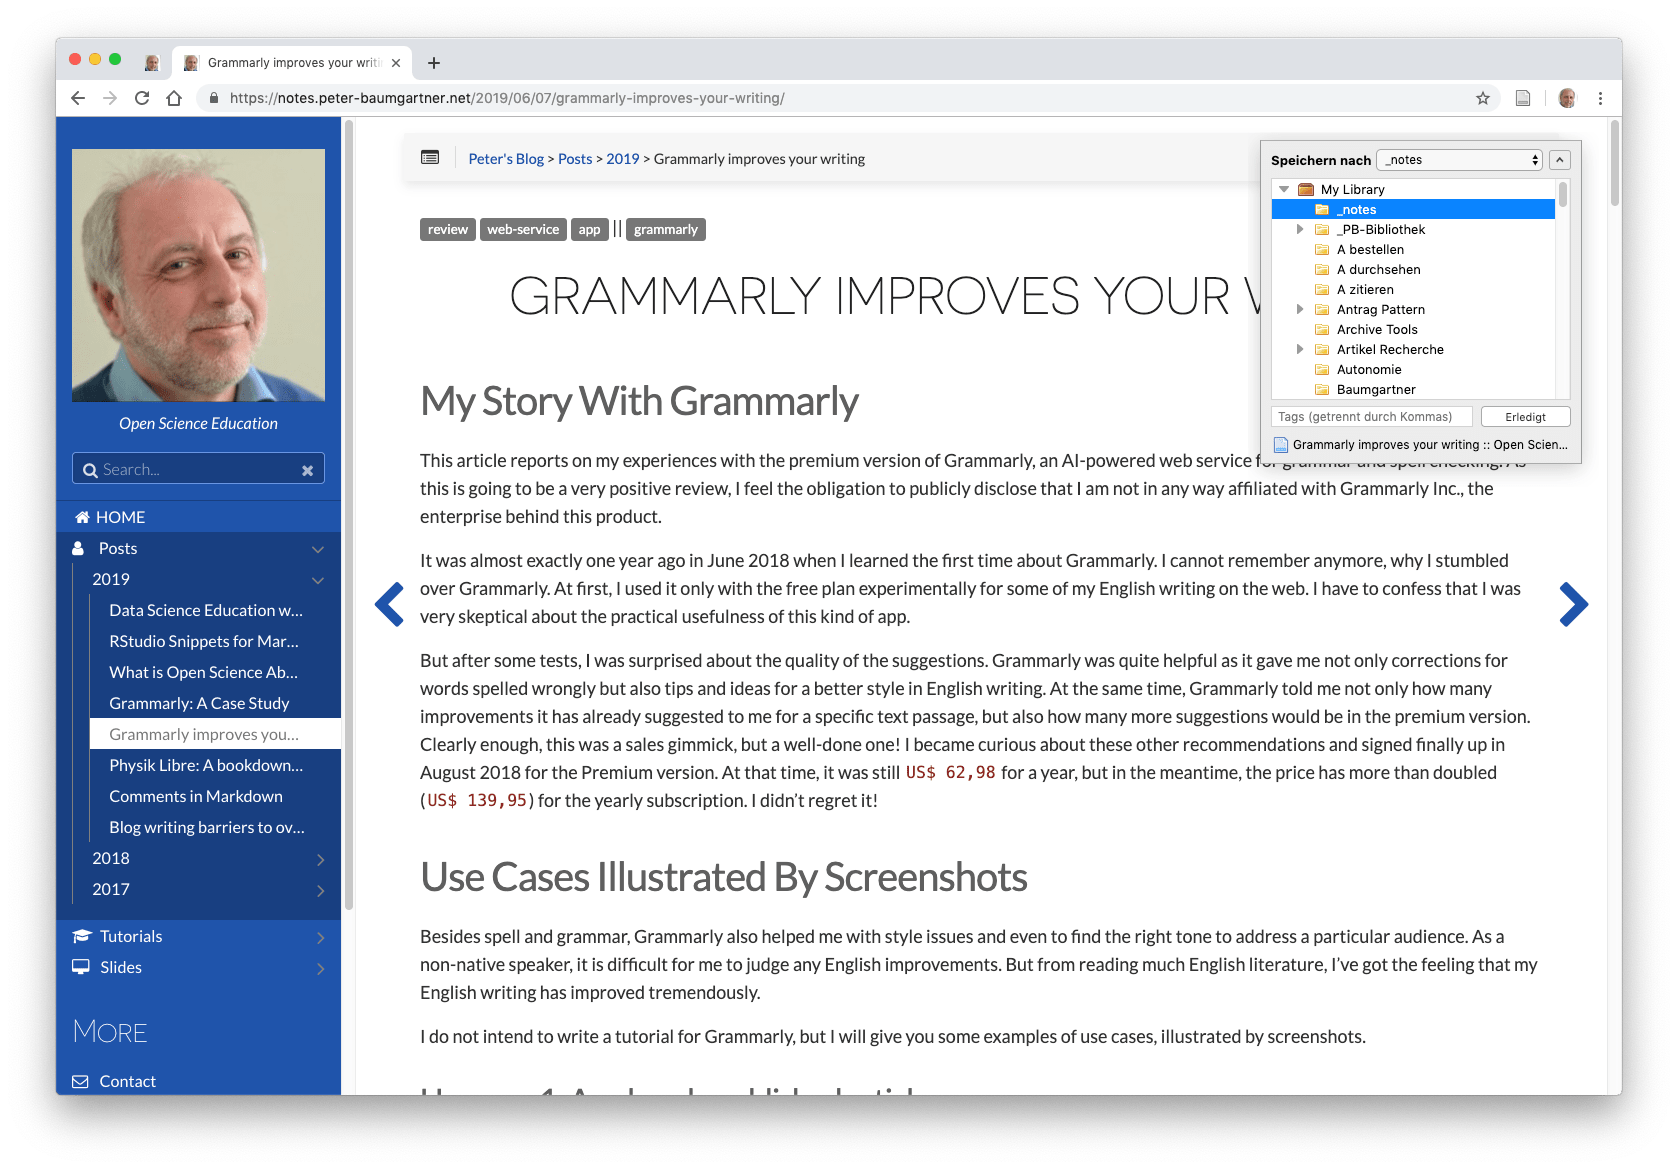
Figure 02: Download the rudimentary bibliographic information with Zotero. Change to Zotero and inspect the new downloaded entry. You will notice that many details are still missing.
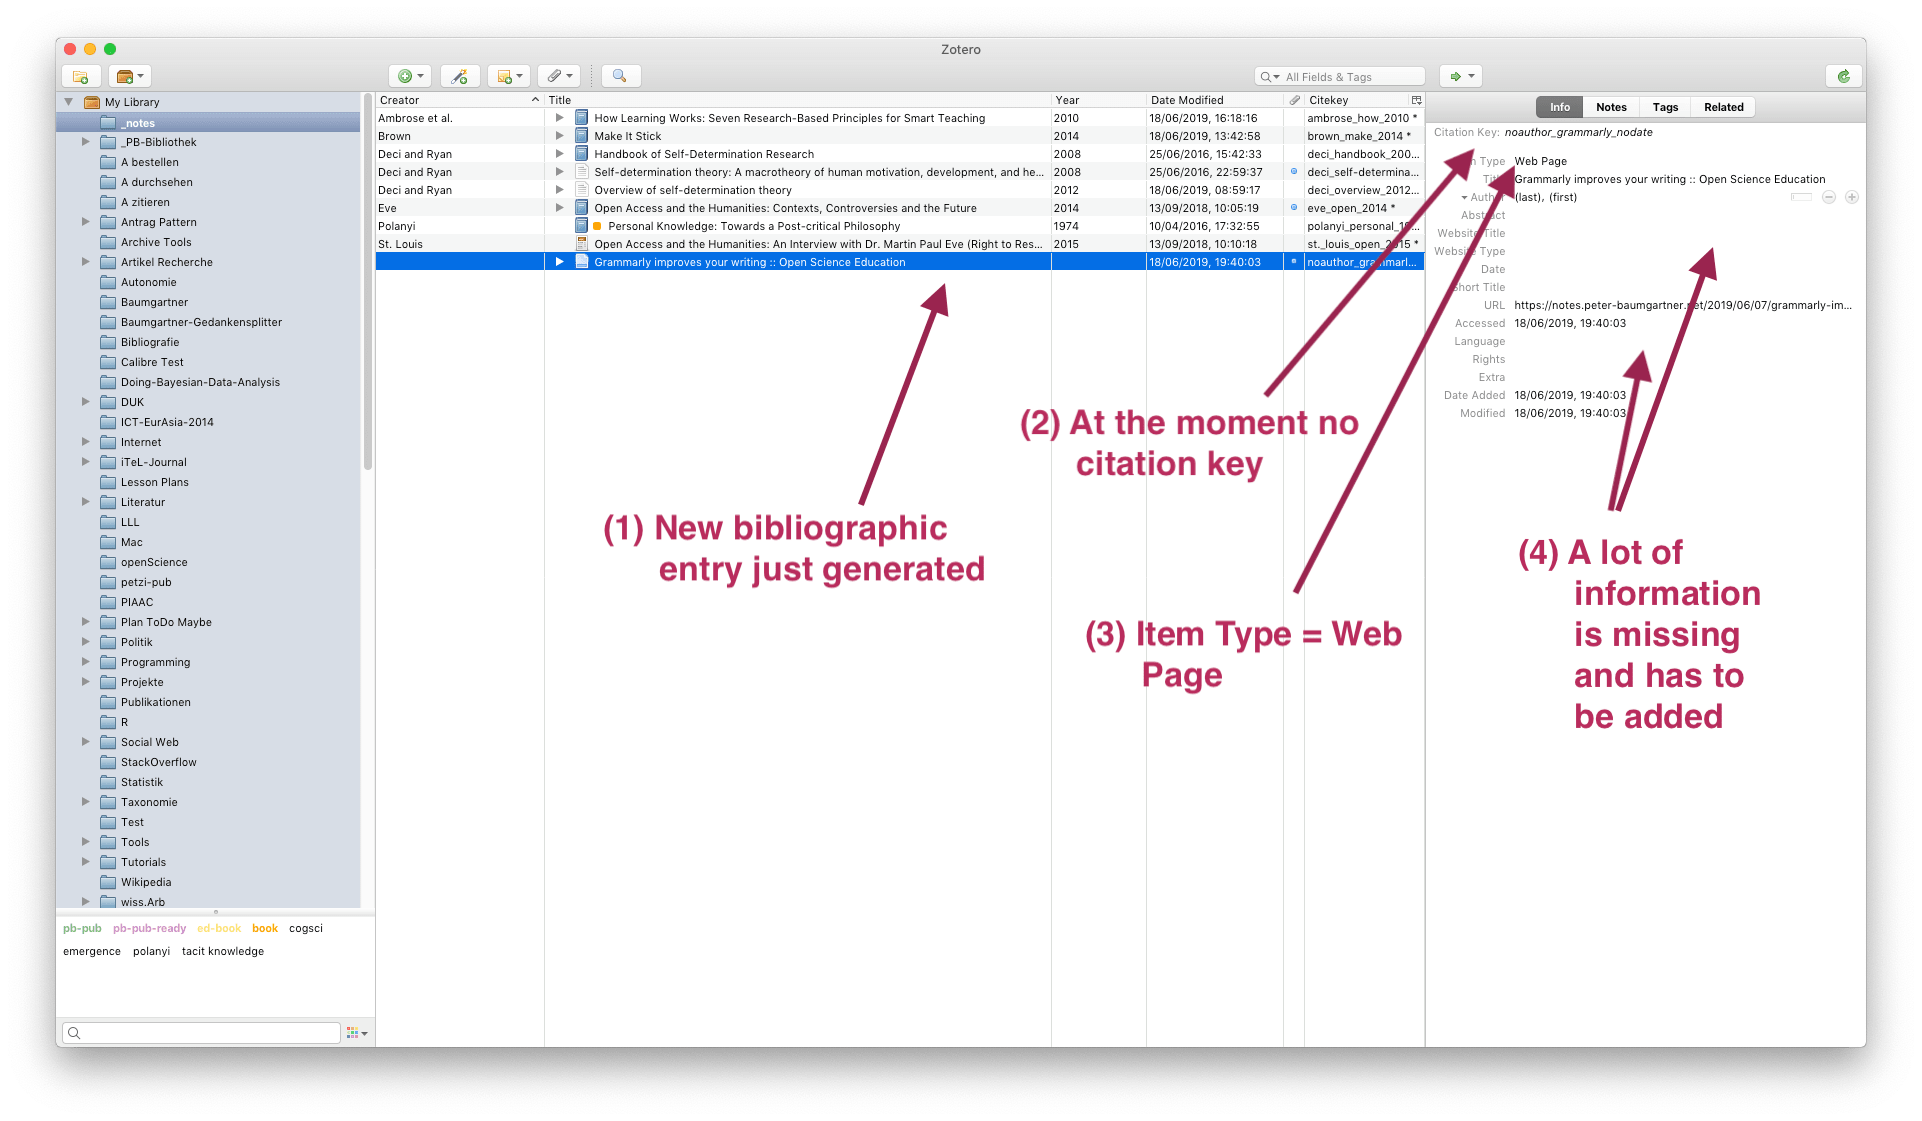
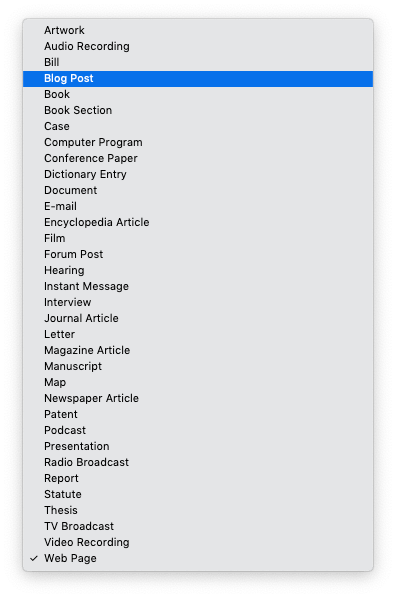
Figure 03: Zotero bilbiograpy with the new downloaed biobliographic entry. Change the item type to an appropriate value: in my case “Blog Post”. You will see that the Zotero icon changes to reflect the new value. Different item types have different fields.
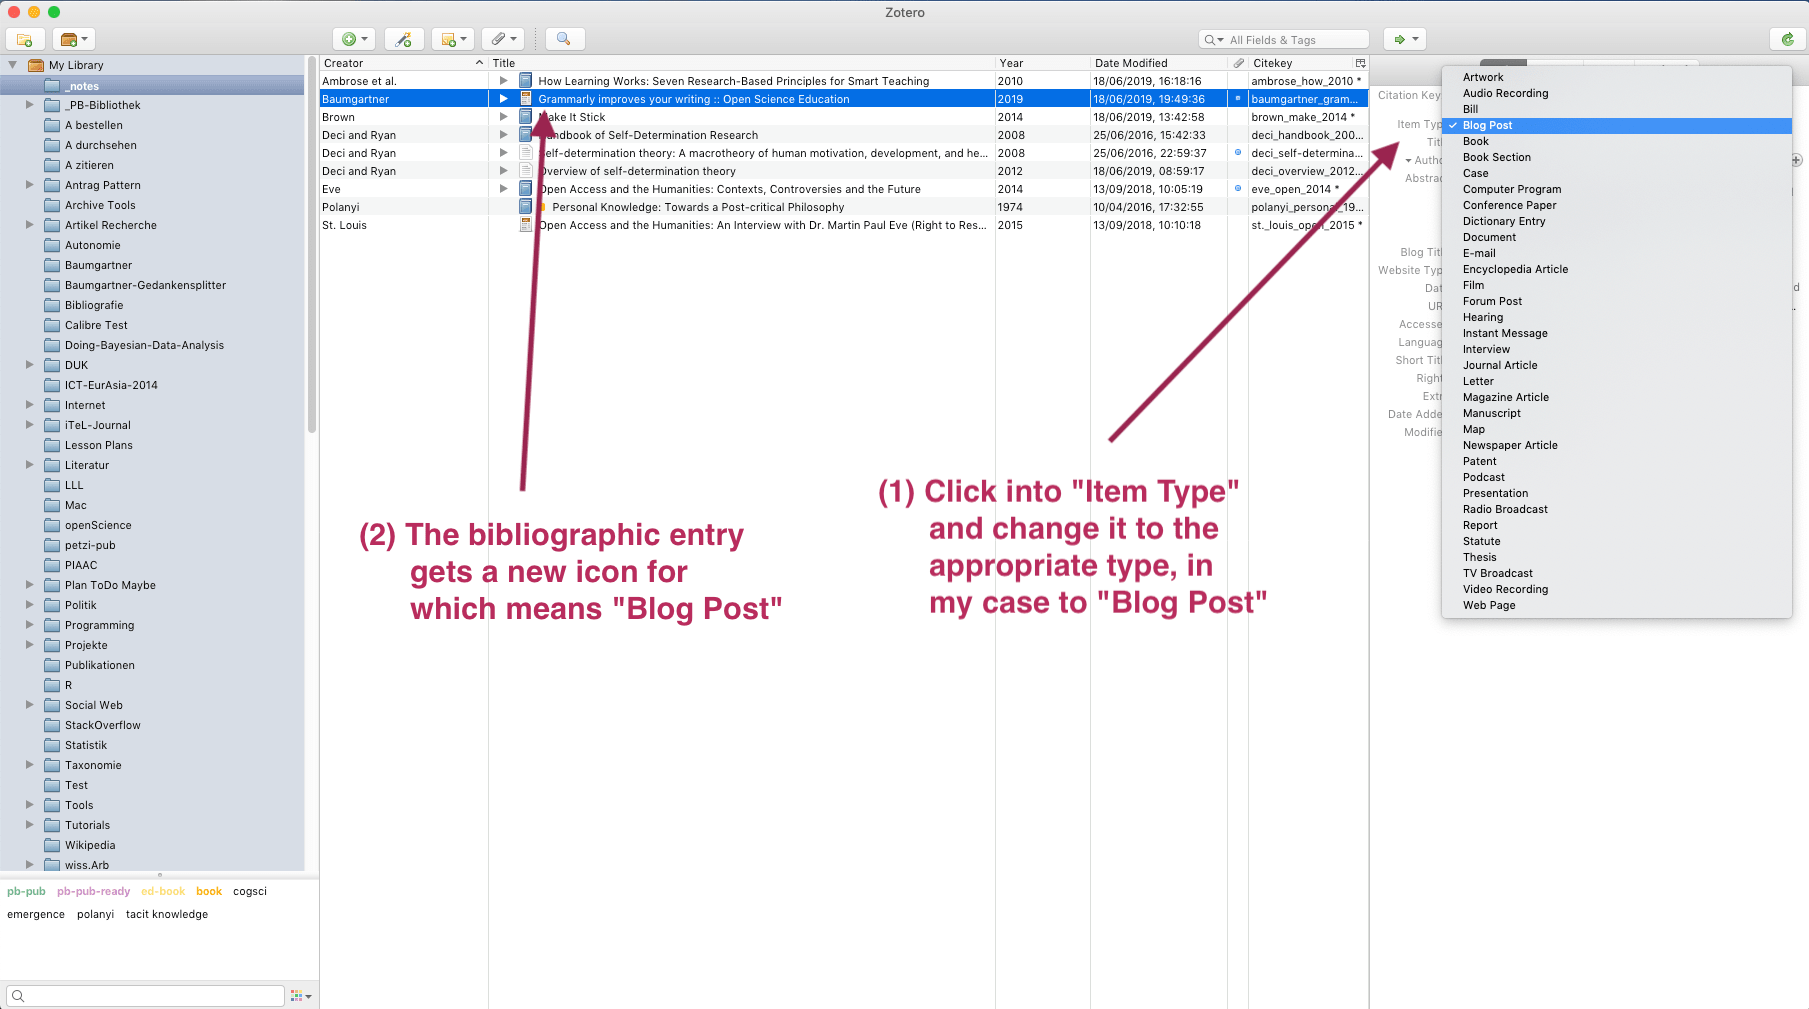
Figure 04: The standard web page entry misses many information in its bilbiographic record. Add the relevant information as shown on the screenshot. Depending on the chosen item type, there are different fields to fill in. There is a list of item types, fields, and their meanings on a Zotero help page.
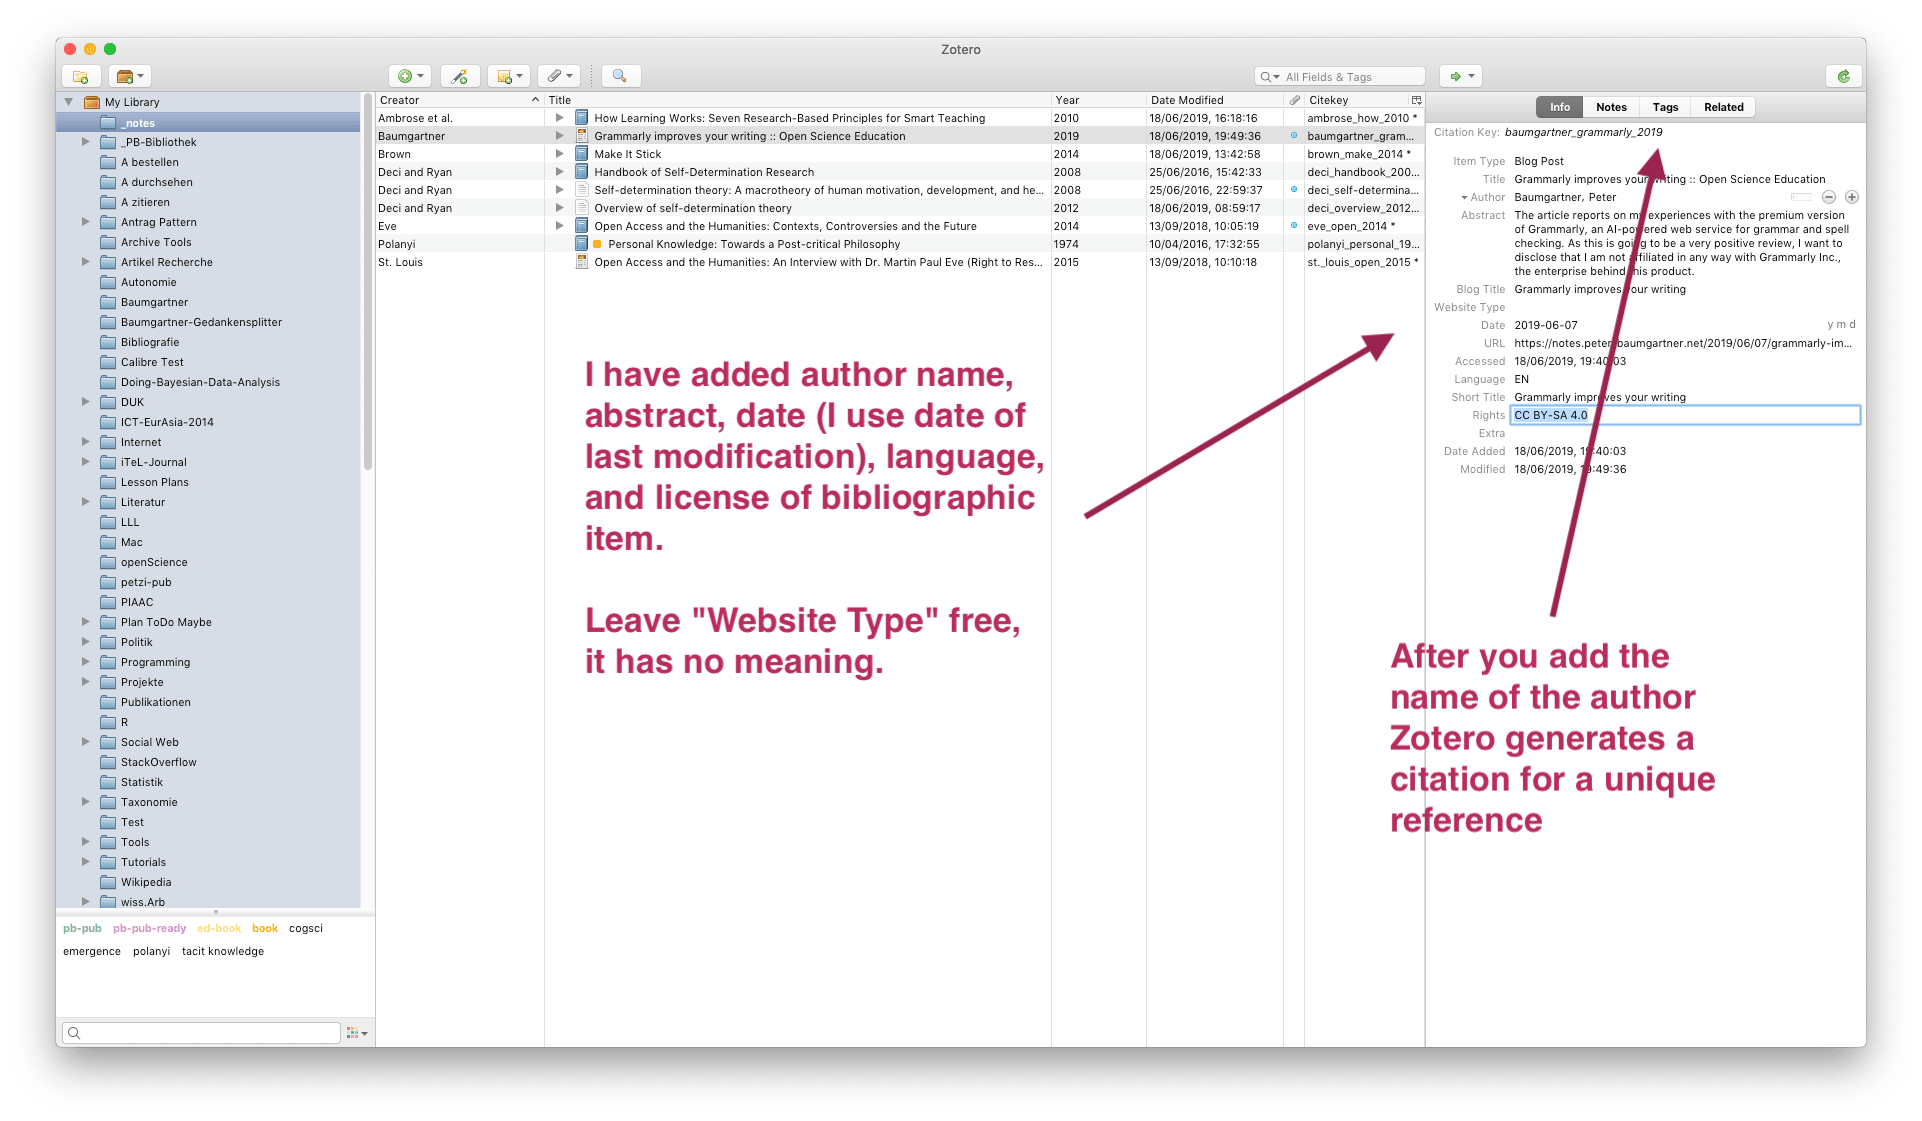
Figure 05: Adding information into the bibliographic record. When you bibliographic entry is complete you can start the conversion and export procedure. Open the context menu (on MacOS is it a right mouse click).
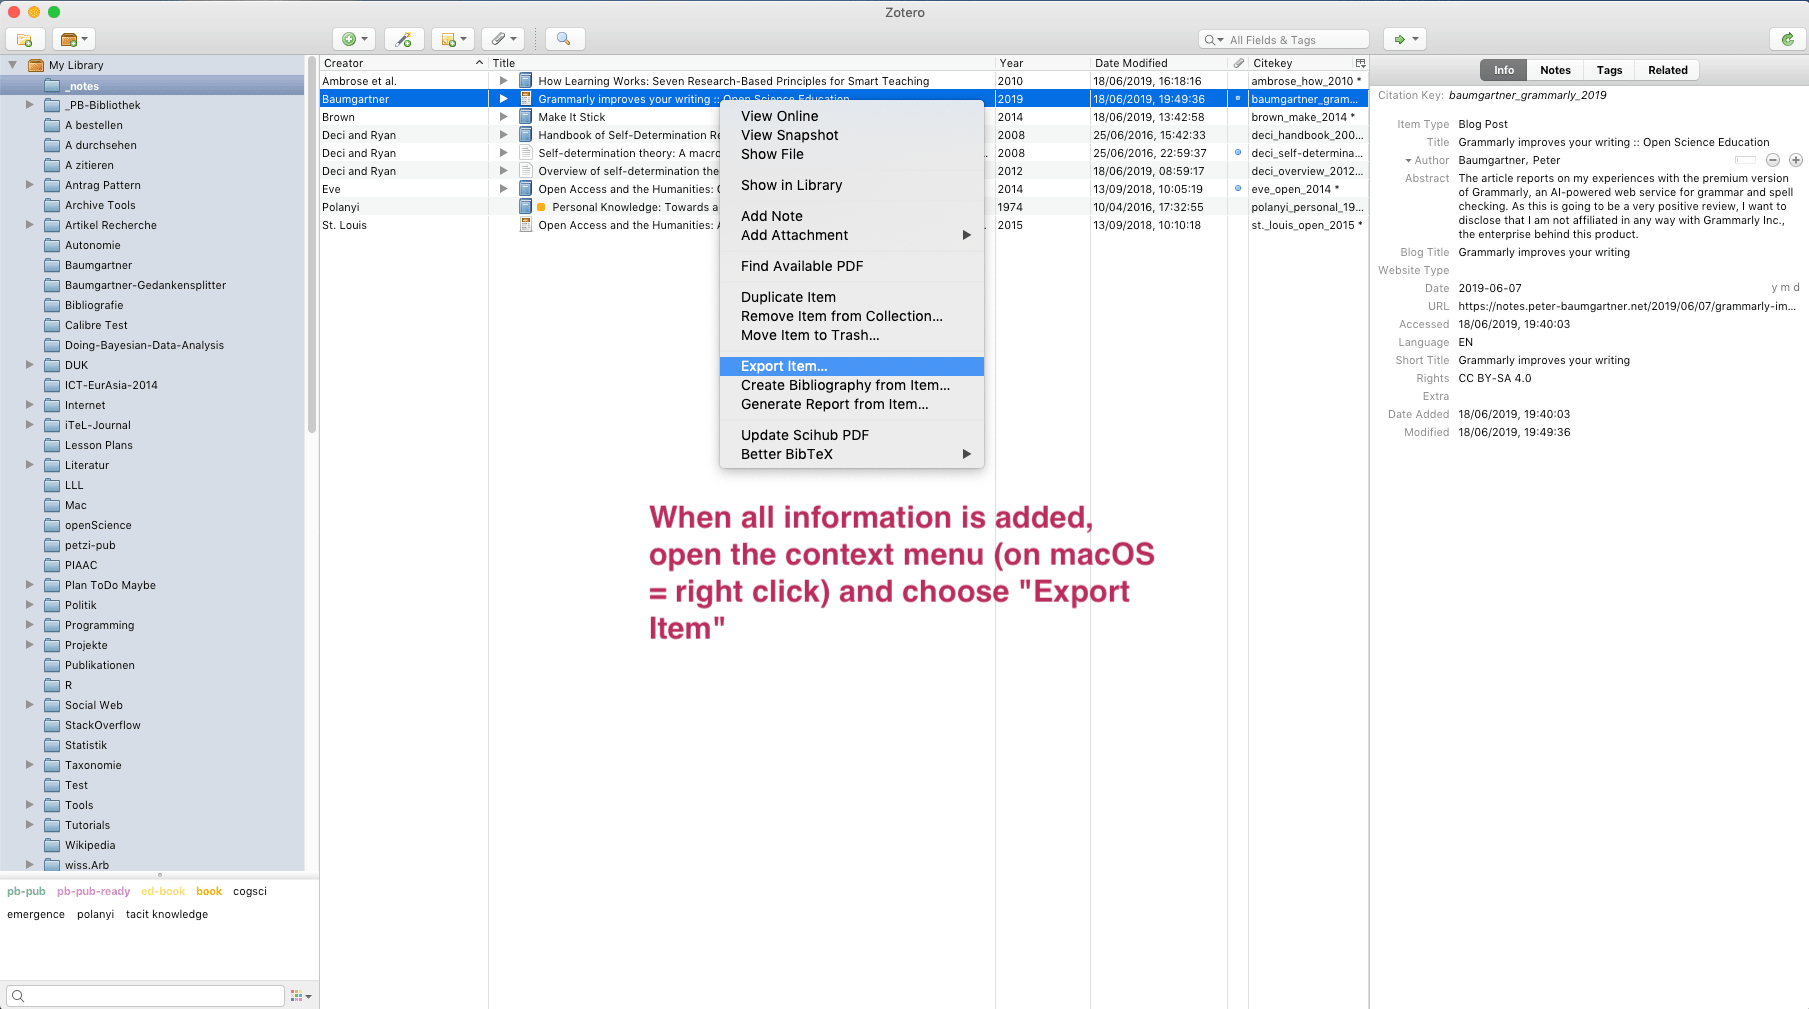
Figure 06: Opening the context menu of the bibliography entry to start the export. From the appearing drop down menu choose the “COinS” translator.
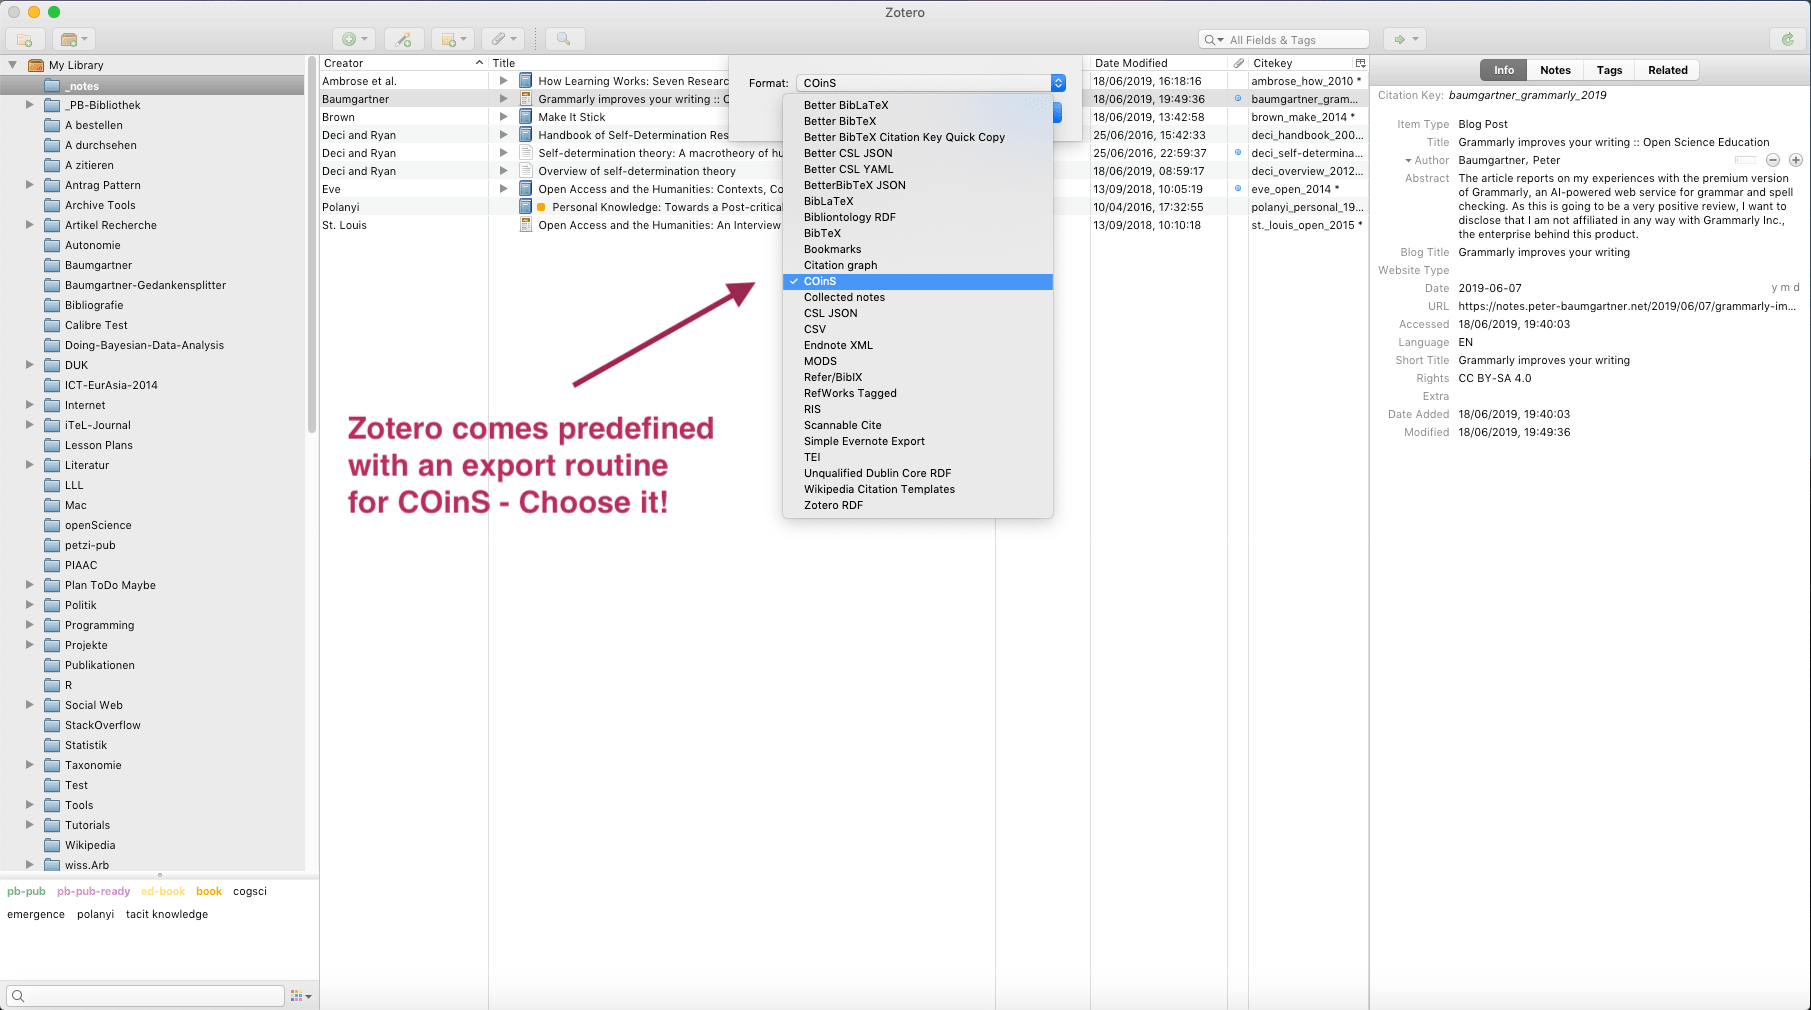
Figure 07: Choose COinS as export translator. Save the converted data in a file on your hard disk. The place is not essential as we only need the text inside the file. After we have copied the COinS data into our web site, we will delete our intermediary file.
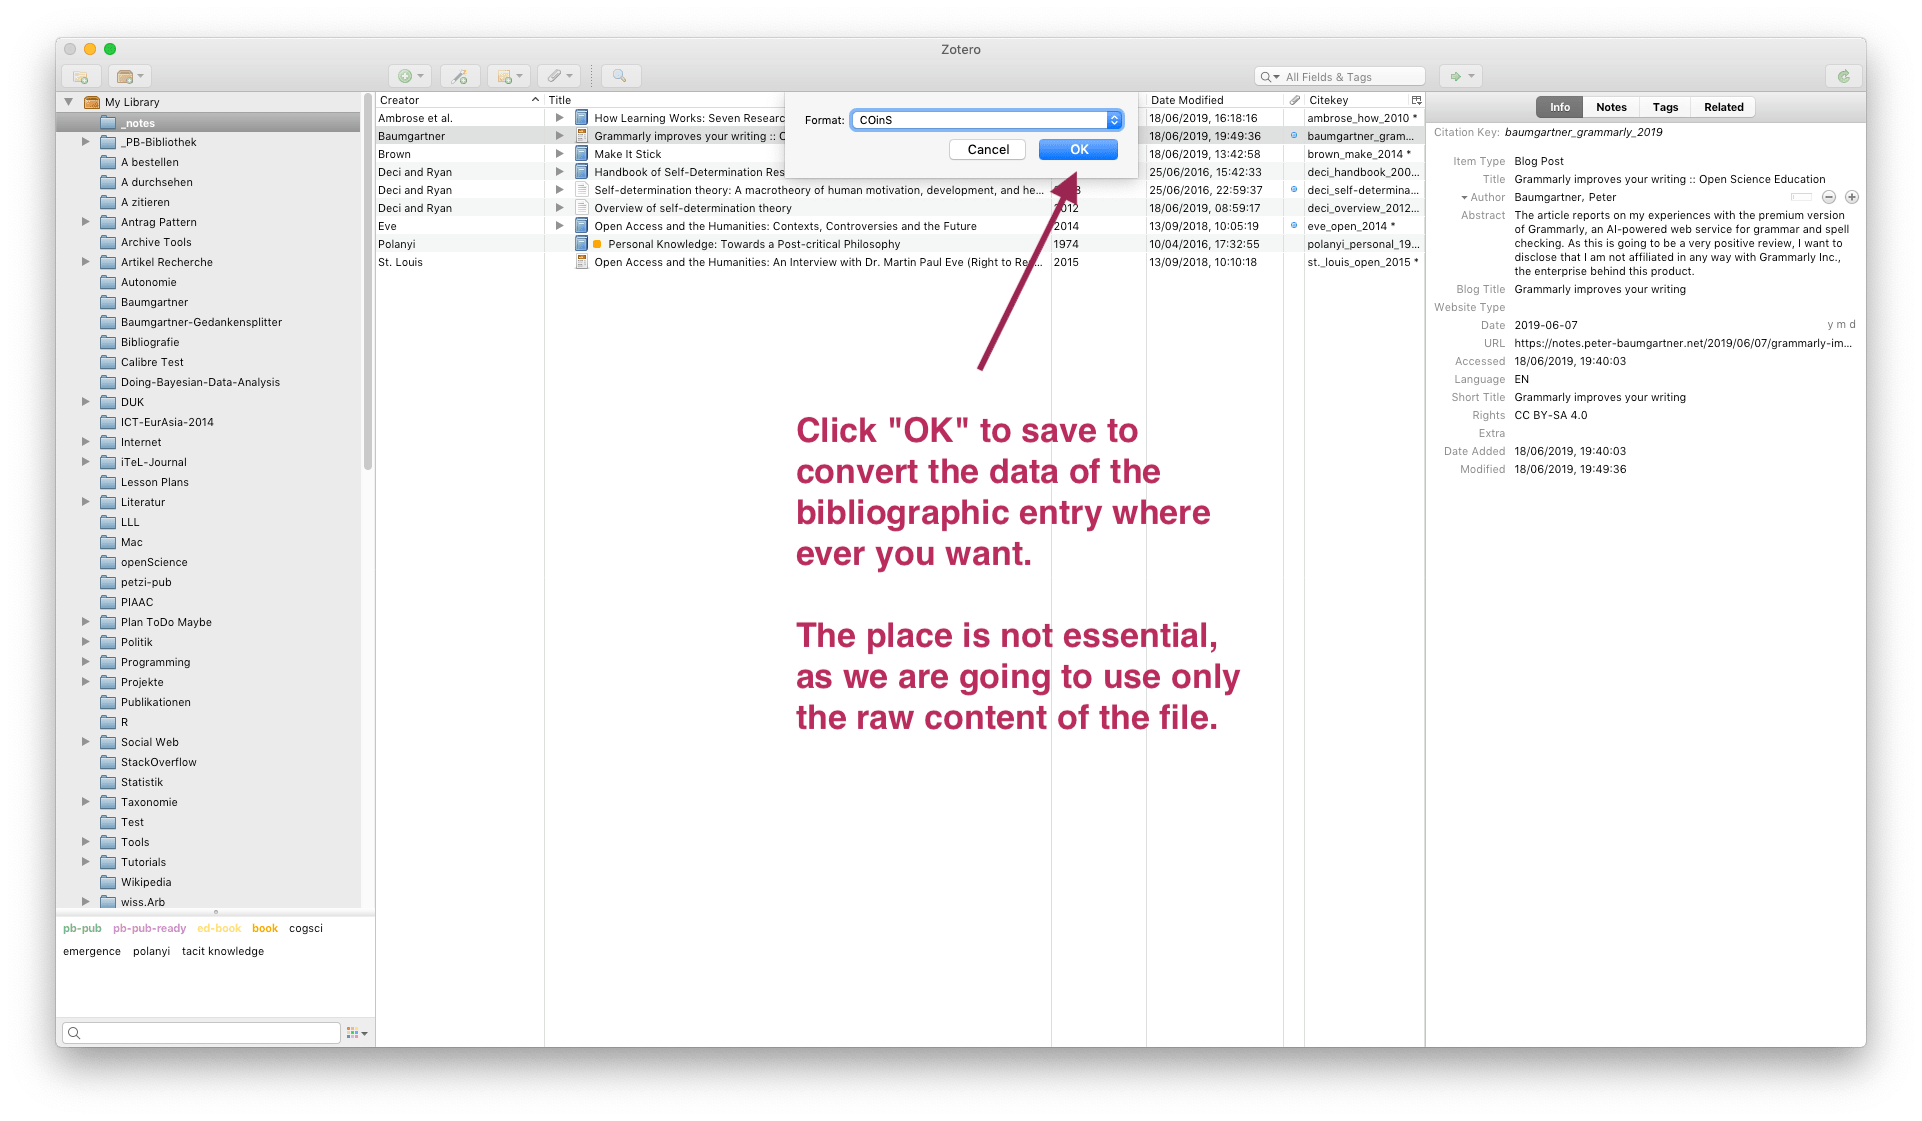
Figure 08: Prepare to save the converted information. File name and file extension are also irrelevant. Just check if your export format is “COinS”.
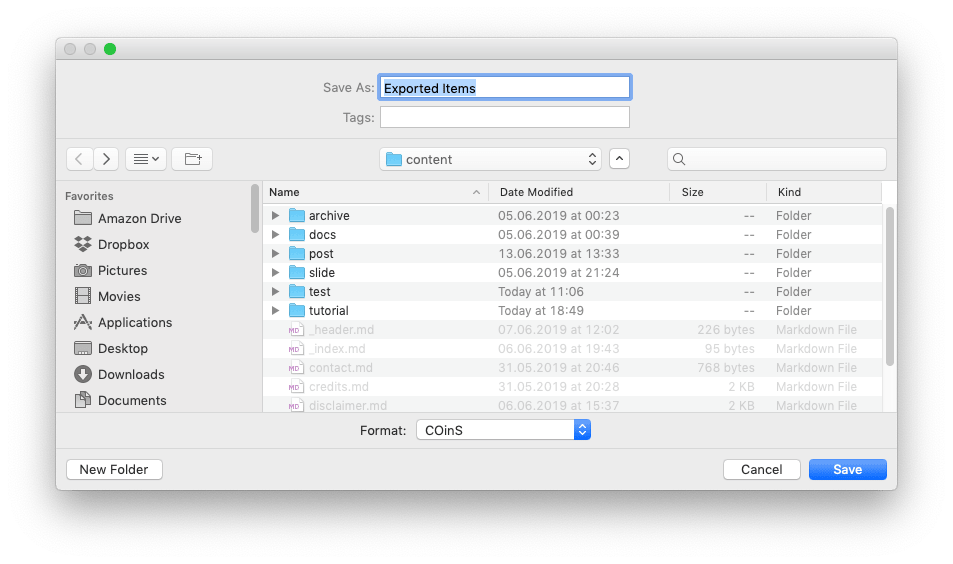
Figure 09: MacOS Save File dialog window with export mode “COinS”. Open the exported file with your text editor and select the COinS HTML code. You will see the text of your bibliography record URL encoded in the COinS standard format. URL Encoding replaces unsafe ASCII characters with a “%” followed by two hexadecimal digits. But don’t worry, it is not necessary to understand the code snippet.
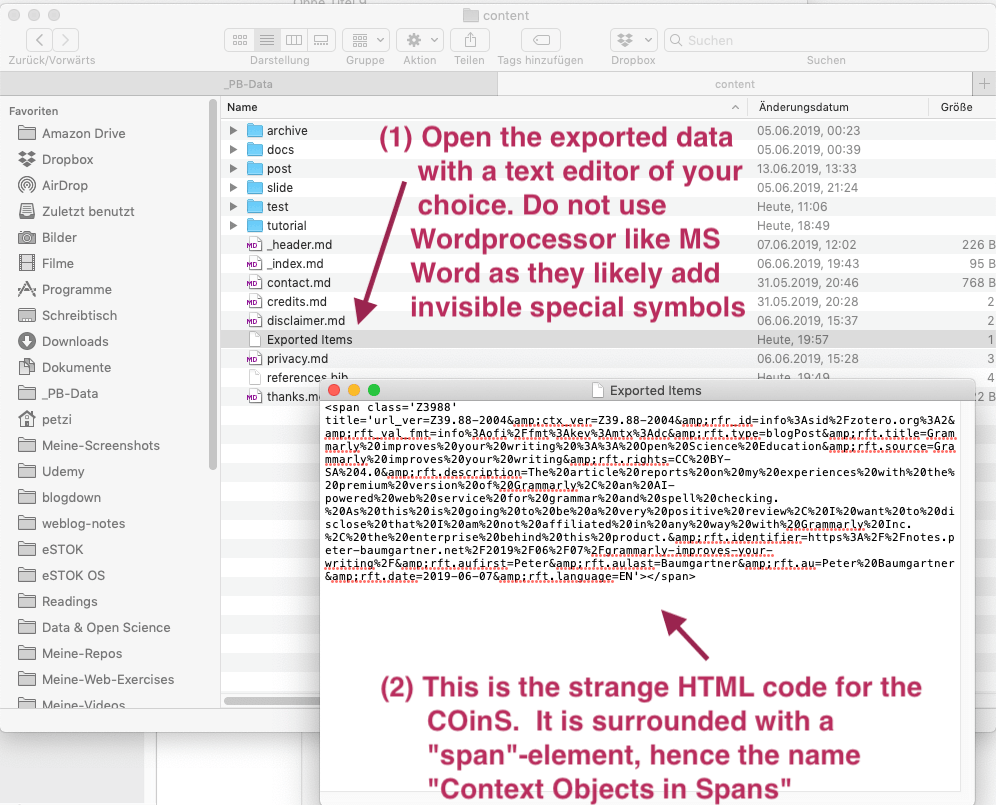
Figure 10: Exported COinS code as it is seen after opening the file with a text editor. Copy and paste the code in the source code of your web page. Again, the place does not matter. On a life web page visitor do not see these code but only the result – the particular Zotero icon.
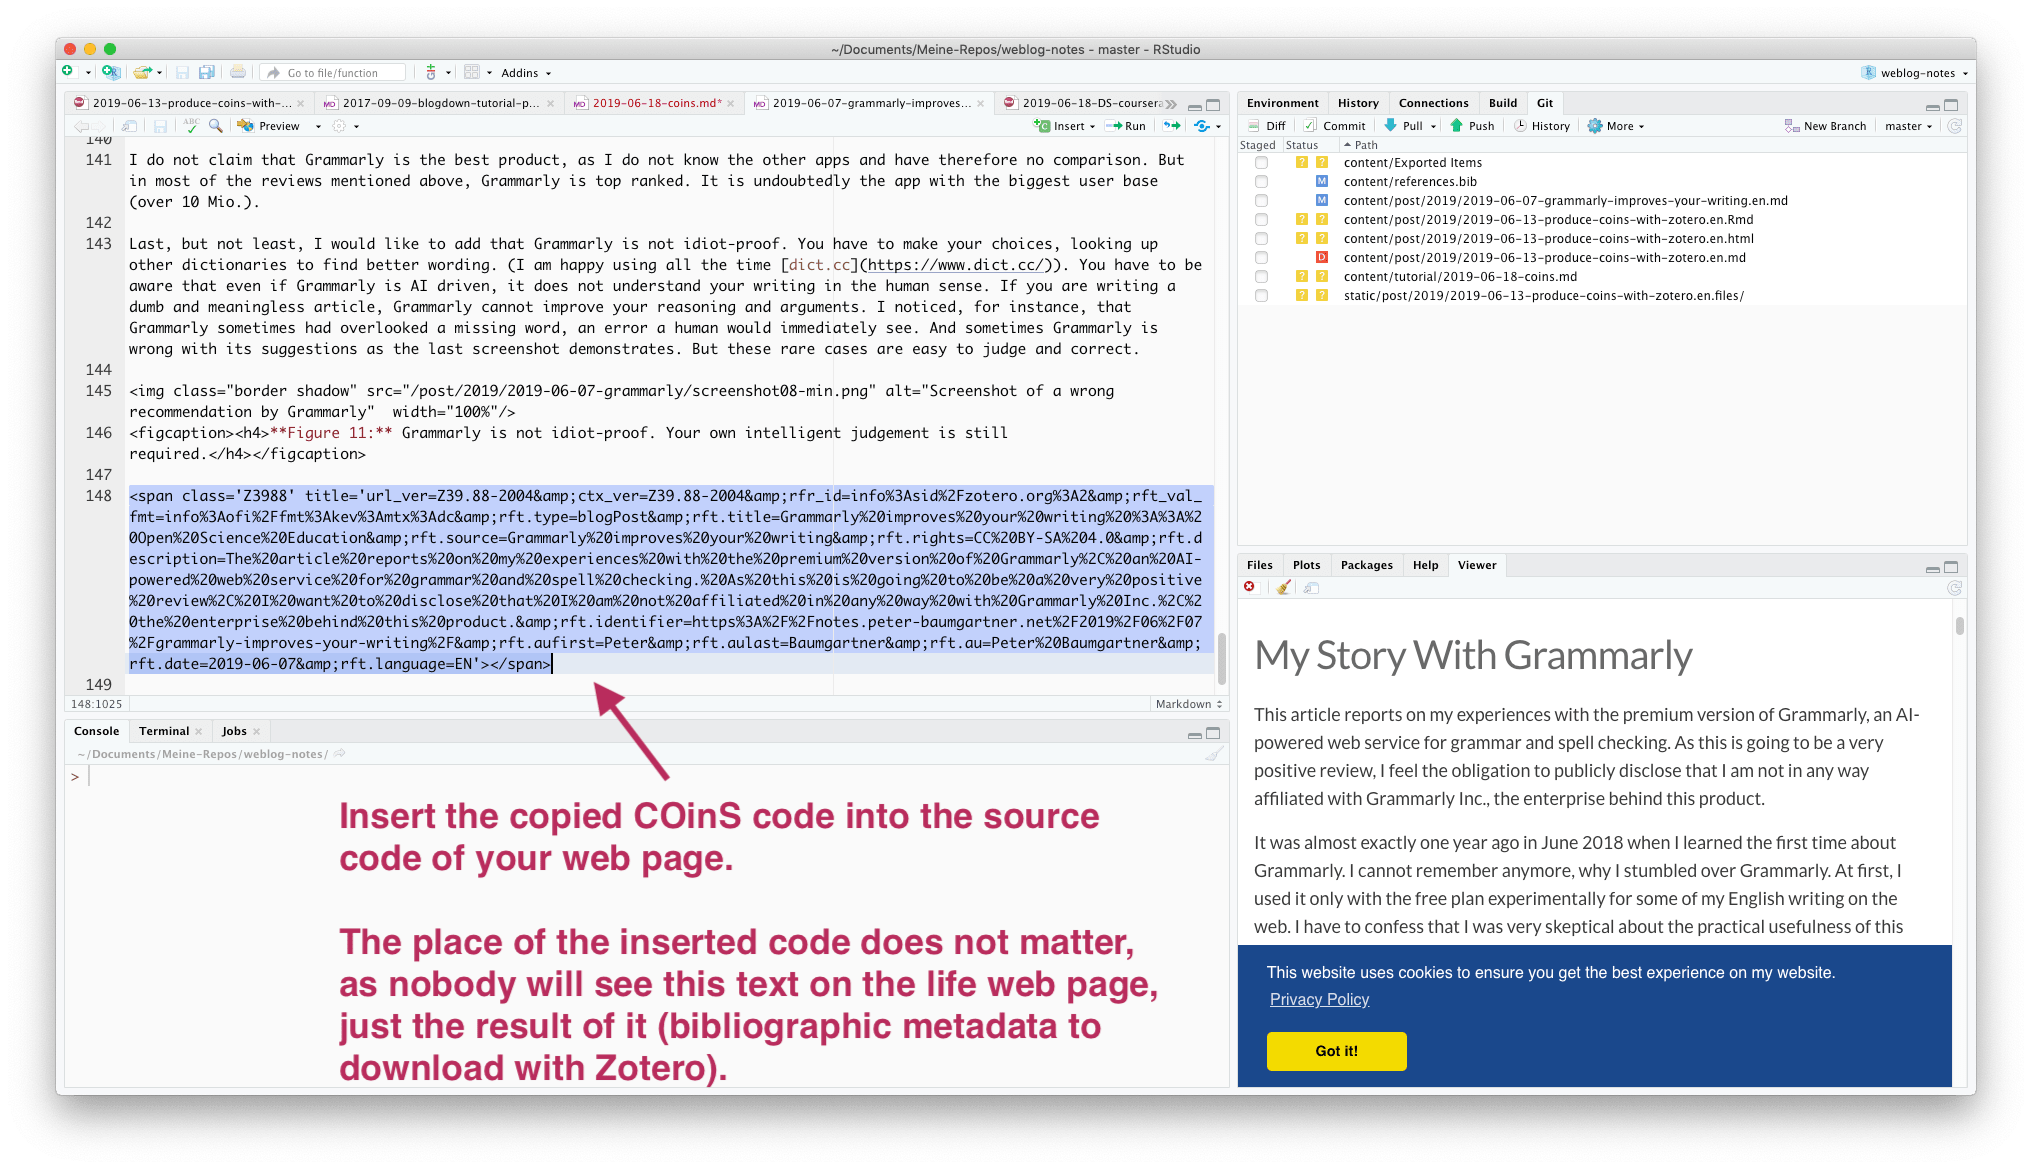
Figure 11: Embed the exported COinS code into the HTML source code of the web page. Now inspect you life web page. You will see that the Zotero icon has changed from “Web Page” to “Block Post”. Congratulation you made it!
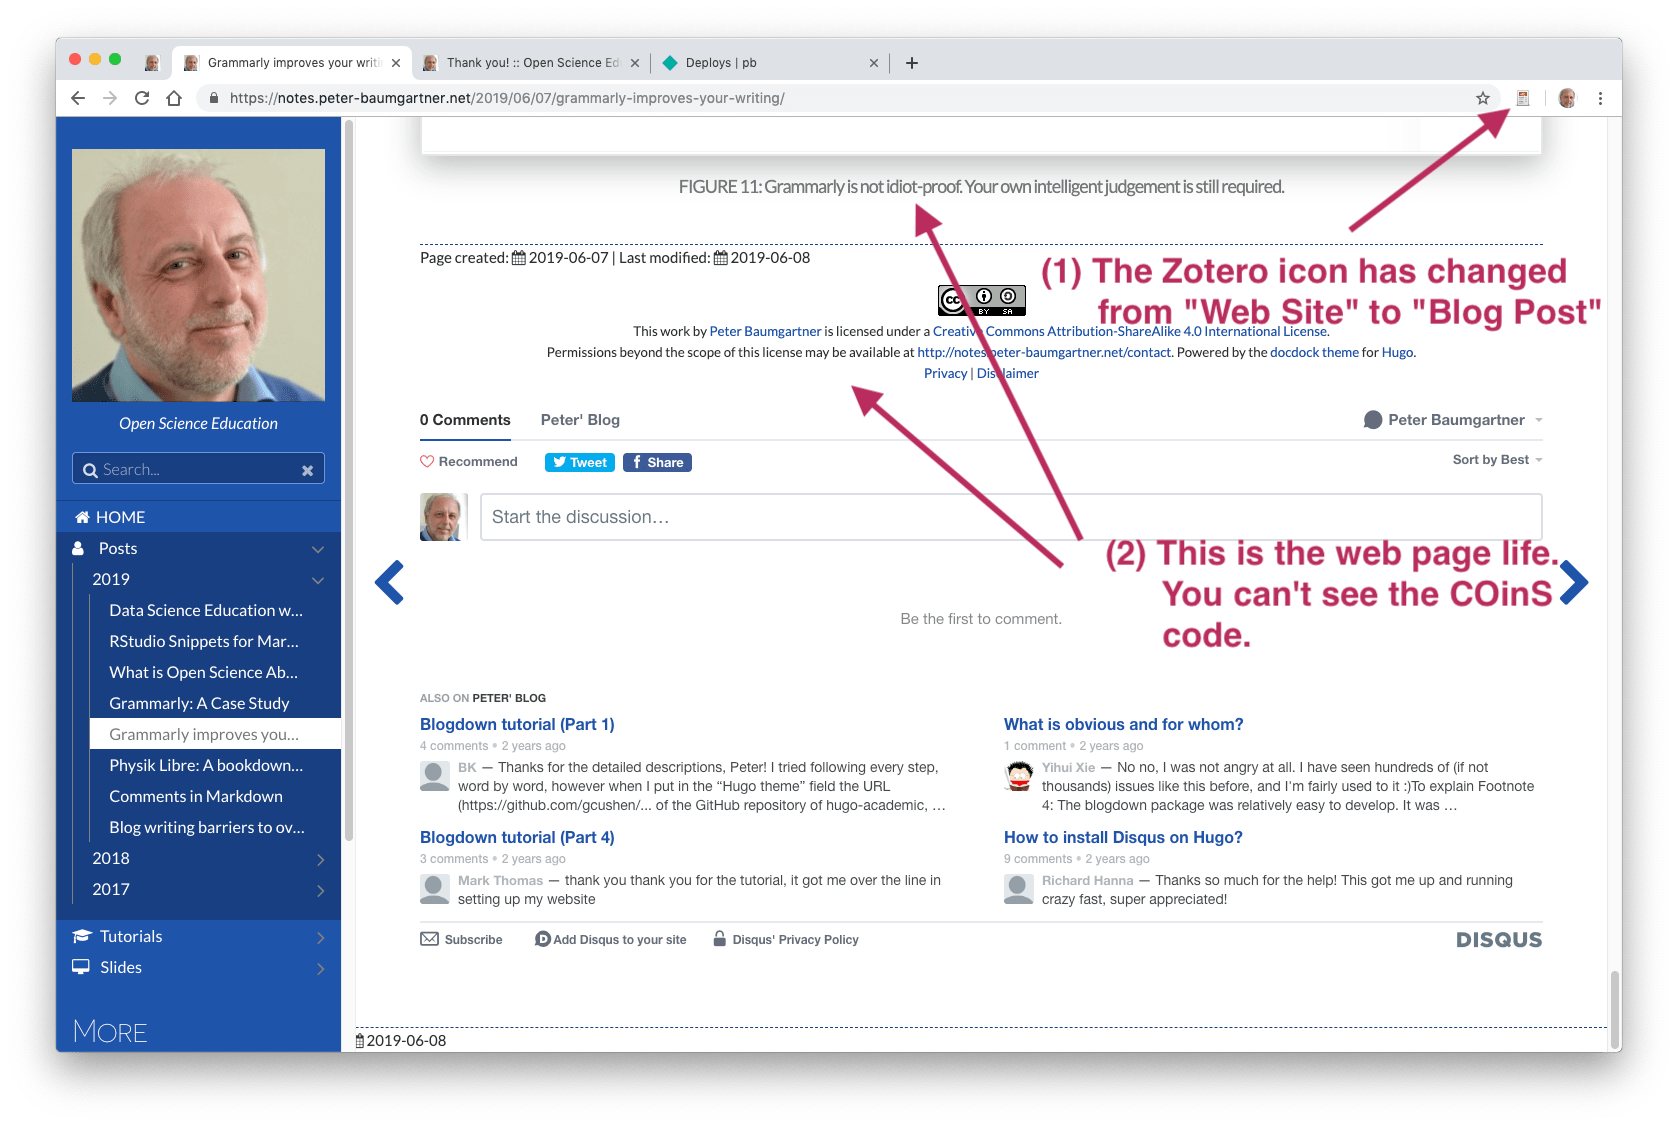
Figure 12: Inspection the modified web page. We need to check if everything works as intended. Save the new generated bibliographic metadata into your zotero database.
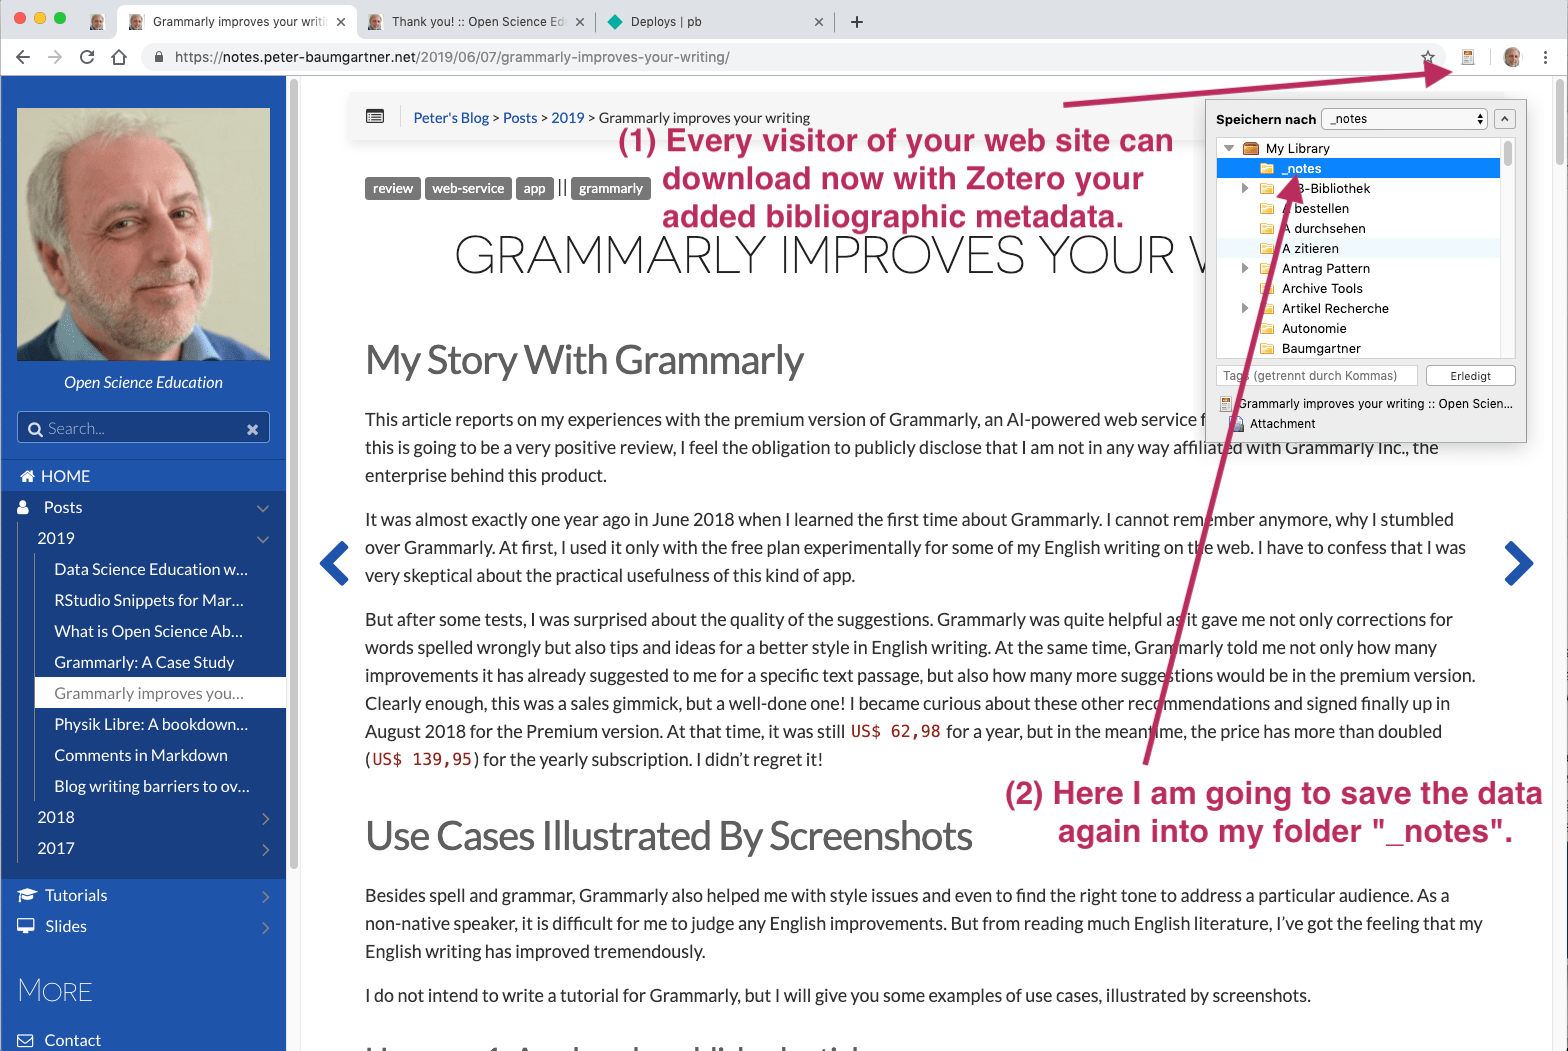
Figure 13: Download of the new generated metadata to test if everything works as intended. Check if all the bibliographic metadata are imported correctly.
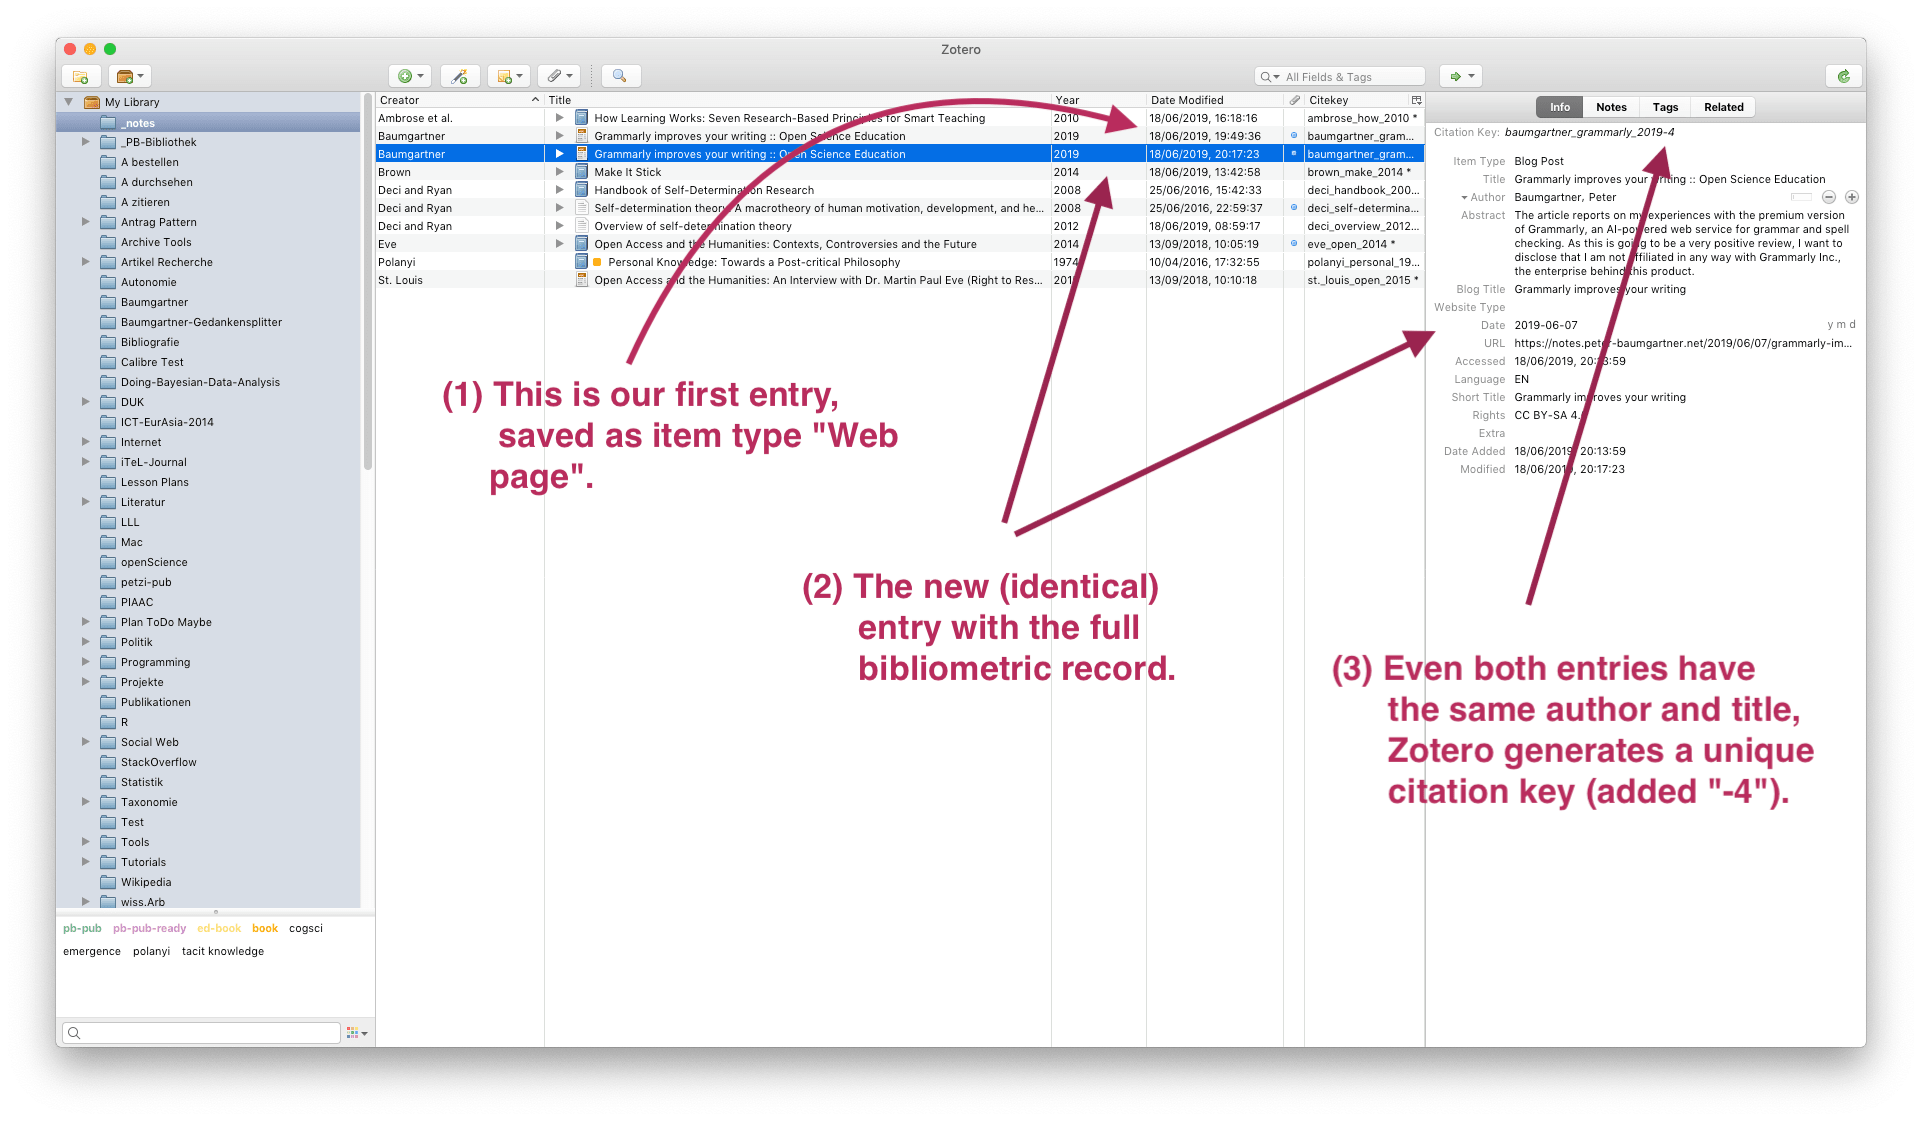
Figure 14: Inspection of the modified bibliographic record in Zotero
Wrapping up and additional information
You have learned to create, embed, and download bibliographic metadata from those web pages where you have access to the source code. There are further options in addition to what I have demonstrated in the tutorial:
- You are not limited to the item type “Block Post”: You can choose from all the 34 different types of bibliographic entries. But watch out: Every item type has its (slightly) different input form and Zotero icon. You need to know what kind of information each bibliographic record type needs.
- You are not limited to one COinS entry: You can generate and embed as many bibliographic entries you want. If your web page has a list of references, you can offer visitors of your web page to download the bibliographic information for the full bibliography. The Zotero icon changes to a folder if there is more than one bibliographic entry to download.
- You do not need to generate a COinS entry by yourself if the bibliographic entry has a DOI: I do not know how this works, but Zotero recognizes DOI entries. See as an example, my blog post about data science education.
Peter Baumgartner
Retired Professor of Technology Enhanced Learning (TEL)
My research interests include eLearning, educational technology, educational design, open science and data science education.