Blogdown tutorial (Part 1)
Update 2021-05-19: Even if some screenshots might have changed slightly, this part of the tutorial is – with one exception (header 4) – still up to date. But there are now many other resources with the same content available.
Especially I would like to recommend Up & running with blogdown in 2021 by Allison Hill, co-author of the blogdown book.
In this tutorial I will show how to install the R package blogdown with the help of the new version of RStudio and how to link your local blogdown-directory to a remote repository on GitHub. But before we actually start with the installation procedure let us define the different ingredients (tools) we are going to use:
Tools we are going to use
- Blogdown is an R package for creating static websites with R Markdown.
- R is an integrated suite of open source software facilities for statistical computing and includes tools for data manipulation, calculation and graphical display.
- RStudio is an integrated development environment (IDE) which sits on top of R and facilitates the use of R tremendously.
- R Markdown is a file format for making dynamic documents with R. It is based on Markdown (a lightweight markup language with plain text formatting syntax), but it also can contain chunks of embedded R code.
- Hugo is a popular open-source static website generator.
- hugo-academic is a theme designed for Hugo to create an academic or personal website. Besides special academic features like sections for publications, projects, teaching it also includes a blog section and supports multilingual usage.
- GitHub is an Internet hosting service for distributed version control repositories. Is is mainly used for source code management, but it works also with plain text markup languages. GitHub offers all the functionality of Git as well adding its own features.
- Git is a distributed version control system for tracking changes in computer files and coordinating work on those files among multiple people.
All these tools are open source and free available.
Preliminary preparations: Installing R and RStudio
There are many tutorials to install R and RStudio. See for instance the video Installing R and RStudio. But at the moment the new version of RStudio which facilitates the installation procedure of blogdown is still not released as standard version. But you can use all these new features by downloading the preview release. As these features will be soon the standard version of RStudio I will explain the installation procedure using this upcoming version.1
Create a blogdown website
Create a new project
After installing RStudio version greater than v.1.1.28 open the project menu and choose “New Project”.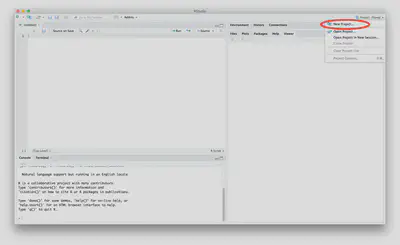
Create a new directory
A new window opens up: We are going to create a new local directory for our static blogdown website. Choose “New directory”.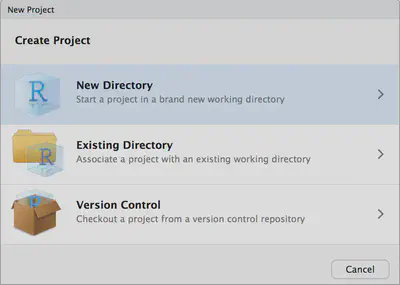
Create a website using blogdown
The selection in the following window is self-explaining: “Website using blogdown”. Here it is the last line in the window. But in the future there may added other project types, so that you have to scroll down to see the blogdown-choice.
Create a website using Hugo and blogdown
Lastly we arrive at the final window we have to answer. Here you can choose the name and location of your local directory which will eventually collect all files of your static website. I recommend to leave all check boxes ticked, as this default value will give you the most support to generate the new website. The program for the static website generator Hugo will be installed automatically as well as sample blog posts will be added. Especially important is the possibility to look into the example site of the theme, because this will provide you with clues about the functionality of the theme.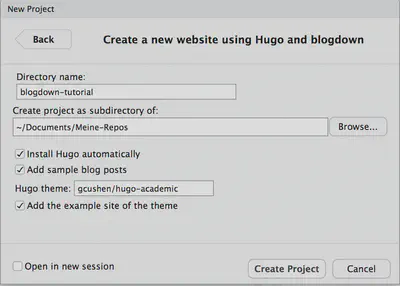
Choose theme
I have chosen the hugo-academic theme. You can pick your own preferred webdesign via the Hugo Themes page.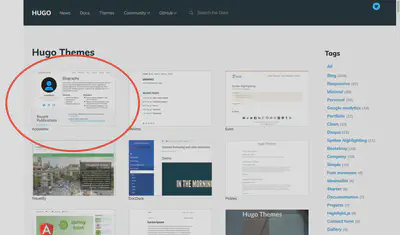
Choose Academic (now Wowchemy)
In the “Hugo theme” field you have to insert the URL of the GitHub repository of the theme you would like to use. You will see the address when you click at the thumbnail of the theme and hover your cursor over the “Download”-button.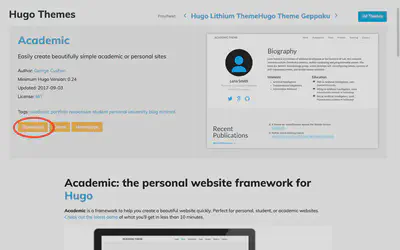
GitHub repor of Academic theme
Clicking on the download button will bring up the developer’s repository. This is useful even for beginner as you can have a look of the ongoing discussion under the “issue” tab or to ask your own questions. Experienced users can fork the repository in order to adapt the functionality of the theme and/or to suggest code changes to the developer via the push mechanism.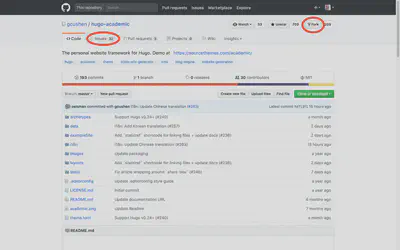
Create project
When you finally click the “Create Project” button you have to wait few seconds until the selected theme is downloaded and Hugo installed. After the installation is finished RStudio opens up a four pane view. We will go more into the details of these different windows in the third part of this tutorial.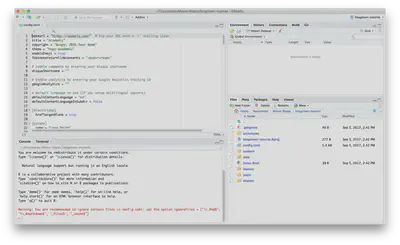
Summary
We have successfully installed the hugo-academic theme in a version controlled local directory. Essentially we could now start to personalize the website and/or write articles resp. posts. But we will continue the installation process with creating a remote GitHub repository which has to be linked to the just created local repository. The remote repository not only operates as backup and as distributed version control (allowing collaboration) but also enables – beside a manual transfer via ftp – additional ways of publishing your website. We will cover these possibilities in the following parts of this tutorial.
Go and visit the second part Creating a GitHub Repository of this tutorial.
To use features supporting blogdown websites the RStudio version has to be higher than v1.1.28: As today (2017-09-04) the actual preview version is v1.1.353. ↩︎
Peter Baumgartner
Retired Professor of Technology Enhanced Learning (TEL)
My research interests include eLearning, educational technology, educational design, open science and data science education.