Blogdown tutorial (Part 3)
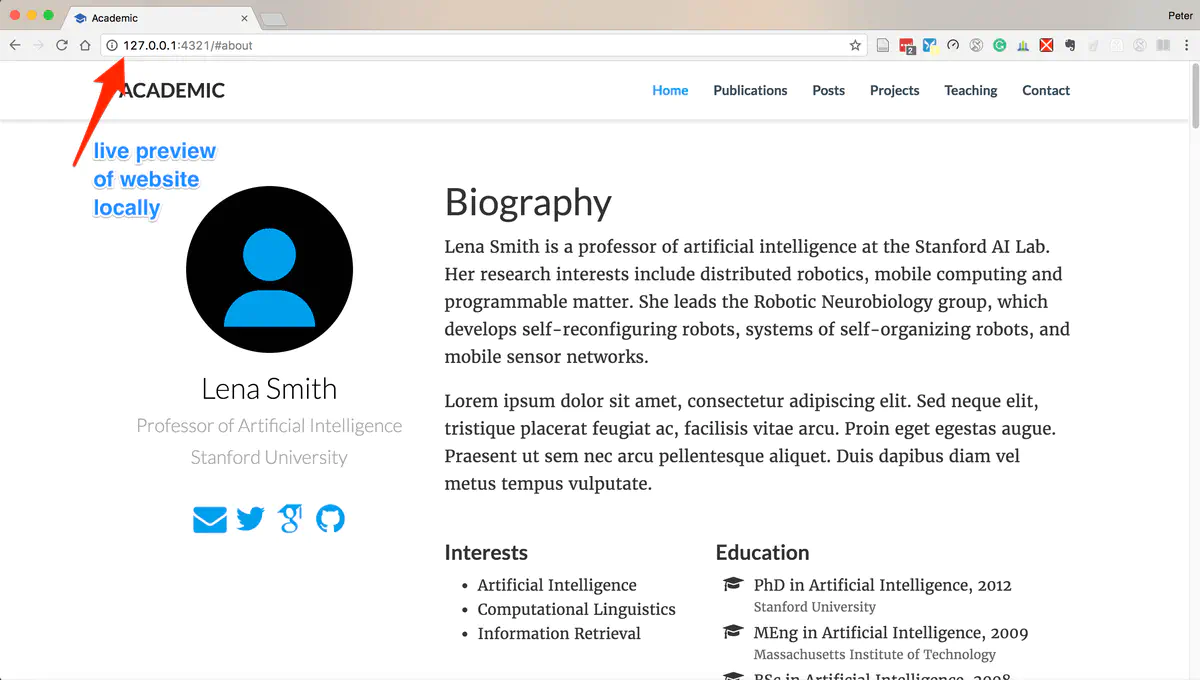
Live preview of your website
Update 2021-05-19: Because of breaking changes in Hugo and new features in blogdown this post is partly outdated.
Complement this sequence of the tutorial with reading Up & running with blogdown in 2021 by Allison Hill, co-author of the blogdown book. With some knowledge the explanation of the changes of blogdown version 1.0 could also be useful.
In this third part of the blogdown tutorial I will explain the necessary steps to get a live preview of your website. The main advantage to bring up your website locally is that you can view and test your website during working on your post without the need of an internet connection. You have not even to reload the page as this is done automatically through a technology called LiveReload.
Warning after installation
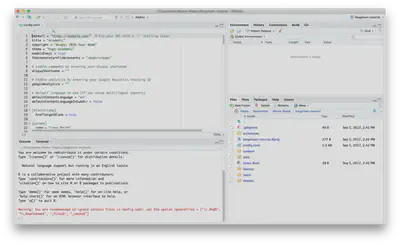
After we have finishing the installation we have gotten a red warning. It is a reminder not to transfer files which are not used displaying the website. At that time we didn’t bother about it. I have replicated the picture of step number 8 of the first part of this tutorial as a starting point for this third part of the tutorial.
Ignore some file types
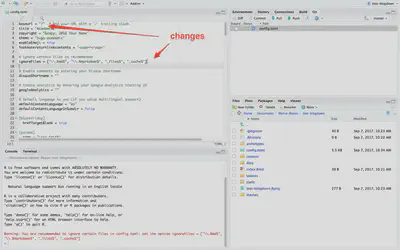
After the installation config.toml is opened automatically by RStudio. We add the recommended line ignoreFiles = ["\\.Rmd$", "\\.Rmarkdown$", "_files$", "_cache$"] in an upper place. On this occasion we also change the base URL (first line) to /. After saving theses changes the version control (Git tab right upper pane) will display config.toml with a blue M (modified).
Demonize server
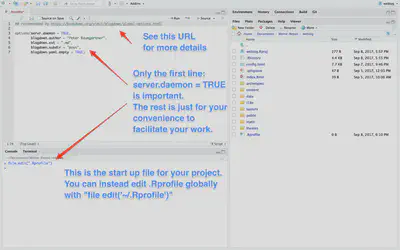
Before we start posting our website locally we should arrange that the local server runs as a background process (= aka to demonize the server). You can run the command options(servr.daemon = TRUE) on the console (lower left pane), but – as I am using this process all the time – I prefer to write this line into my start up file. On this occasion I also add some other convenient commands to facilitate the generation of new posts. See the blogdown page on global options for more details.
Start local server
We can now start the local servers: Choose from the “Addins” menu the “Serve Site” option. This will run the command blogdown::serve_site() to build the site to get a live preview of the website locally.
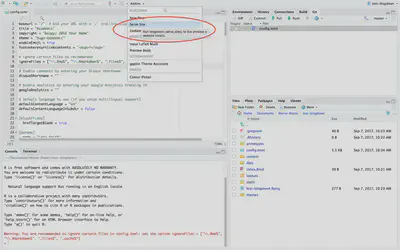
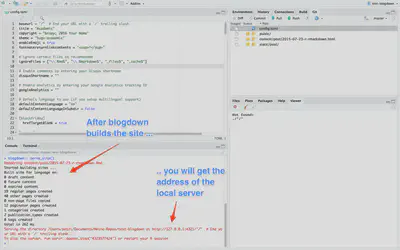
Building the website
Blogdown is building the site and will give you the local server address. It is normally http://127.0.0.1:4321/. While the server is demonized you can still use the console, otherwise a small red stop sign will appear in the right corner of left lower pane and no command can be run in the console window. The best way to stop the server is to restart R (shortcut = CMD + SHIFT + F10).
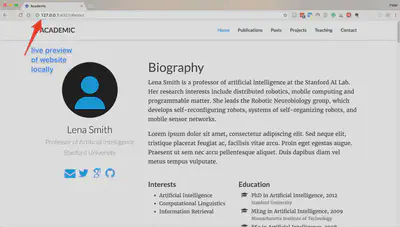
First preview locally
We can now inspect our website in a browser with the web address http://127.0.0.1:4321/. Whenever we type something in one of our files and save the changes blogdown will rebuild the site and we can immediately see the changes in the browser via the local address.
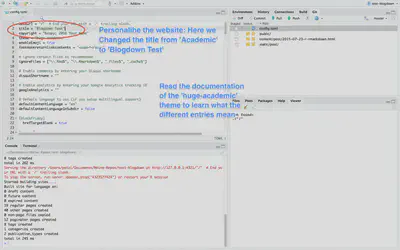
Adapt personal information
Until now all the information this tutorial has provided was the same whatever theme you are going to choose from the Hugo theme wsebsite. But from here now comes your specified theme into play we will look into some necessary adaptions before we going to publish our new website. You can now adapt the personal information in your config.toml file. Read the documentation which comes included as posts of the sample site http://127.0.0.1/#post or go directly to the demo site. I have for instance changed the title of the website from ‘Academic’ to ‘Blogdown Test’.
Create first post
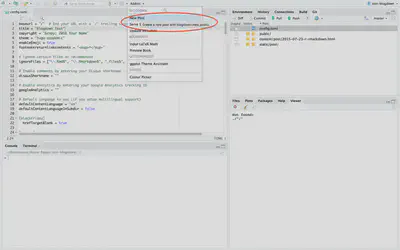
To write posts choose ‘New Post’ from the Addins menu.
Add metadata
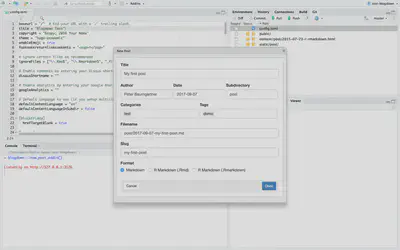
This will open up a window to fill in metadata. This form is already populated with the variable from our .Rprofile, so that you only have to add the post title. File name and slug will be generated automatically from the post title. Categories and tags can be filled now — or later written in the file header or via the Addins menu ‘Update Metadata’ added.
Start editing text
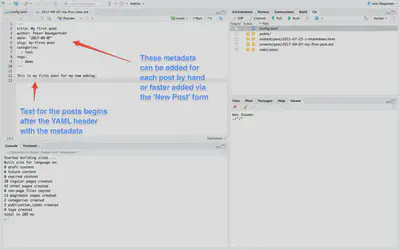
The ‘New Post’ form creates a new file for the post. The first few lines are filled with metadata of the post. You start with the post text under the second three dashes of the post header. To format your text nicely learn the Markdown
Inspect post locally
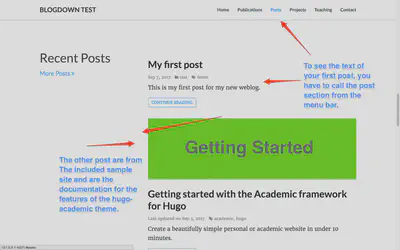
After saving your text, you can finally inspect your first post locally! Posts in the hugo-academic theme can be found in post section of the website.
file.edit("archetype/default.md") and add the example text written in the warning message.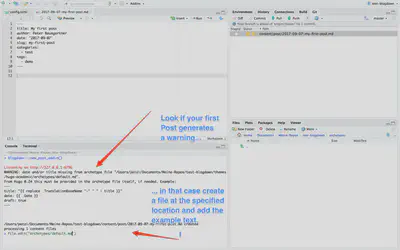
Finally: Visit the final part of this tutorial to bring you website online.